As of Junos 15.1F4, Juniper are now officially supporting vMX on Vmware.
The installation process has quite a few steps to it, so following on my my vMX Getting Started Guide for KVM, here is a quick post showing you how to do it on your home lab running Vmware Hypervisor ESXi 6.0.
ESXi Installation
Let’s get started with the installation of ESXi. I’m doing this running ESXi as a nested VM on a Macbook, but the process would be the same if you were doing it on bare metal.
Register with Vmware and download the ESXi ISO from Vmware and then boot your machine from the ISO. The installation of ESXi is a simple process. Go through the installation steps one by one and reboot ESXi once the installation has completed.
Following the reboot ESXi will load up and if your management LAN is running DHCP the host will have been assigned an IP address for management. You need to download the VMware client to be able to manage ESXi free. Open a web browser and connect to the ESXi IP – download the tools as suggested, and then load up the client.
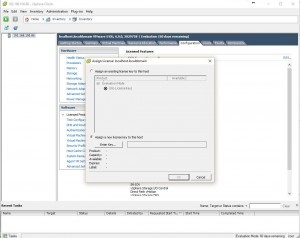
Once the client is loaded, firstly you should license the ESXi host. You can get a free license from Vmware at the ESXi download page.
In the web client the license is applied at Home – Inventory – click configuration and then Licensed Features. You can then click edit to apply the license.
vMX Installation
If you have a valid login, you can download vMX directly from the vMX download page.
Now load up the client for your ESXi server and login.
There is no OVA build currently, so several steps need to be done manually.
Copy Files to the Datastore
Before progressing any further you will need to extract the vMX package. All of the vmdk files are located in the subdirectory “/vmdk”.
- Software image for vMX VCP: jinstall64-vmx-15.1F4.15-domestic.vmdk
- Software image for VCP file storage: vmxhdd.vmdk
- Software image for VFP: vFPC-20151203.vmdk
- metadata_usb.vmdk: Virtual hard disk with bootstrapping information. This is used by the VCP.
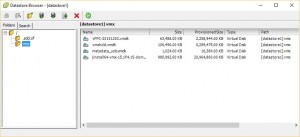
Click the summary tab, select the datastore under Storage, right click and select Browse Datastore.
Create a folder called “vmx” and then click the upload file button and upload all of the vmdk files listed above to this new folder.
Set Up the vMX Network
If you are not familiar with vMX then at this point it would be a good idea to read over my vMX Getting Started Guide for KVM, so that you understand the architecture of vMX, and how the vMX virtual machines communicate with one another.
The VMware release is no different to the KVM release when it comes to the required default networks. There are a minimum of three networks that will need to be configured:
- Management network (br-ext)
- Internal network for VCP and VFP communication (br-int)
- Data interfaces
To create these networks, go back to the ESXi client, select the ESXi server and click the Configuration tab. Select Networking under Hardware. In the top right corner click Add networking.
Management Network
- Select Virtual Machine as the connection type and click next
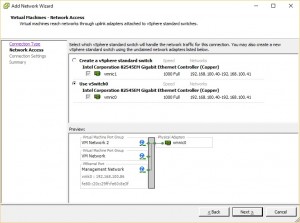
- Select Use vSwitch0 and click next
- At port group properties, set network label to br-ext and click next
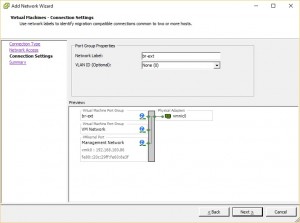
- Now click finish
You will see the new port group “br-ext” has been added to the standard switch vSwitch0.
Internal Network
Again, select Networking under Hardware. In the top right corner click Add networking.
- Select Virtual Machine as the connection type and click next
- This time select Create a vSphere standard switch and clear all physical NIC check boxes, then click next
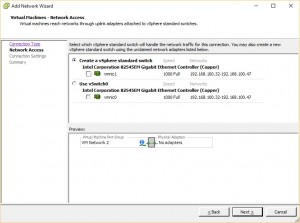
- For network label, use br-int
- You should now have a port group called “br-int”, with no adapters assigned
Data Network
Now add a data network, the process is repeated according to the number of data NICs that you wish to add. Time to create a single adapter named p1p1.
Again, select Networking under Hardware. In the top right corner click Add networking.
- Select Virtual Machine as the connection type and click next
- Select Create a vSphere standard switch and add the physical NIC that you want to use, and click next
- Name the connection p1p1, click next, and finish
Repeat this process if you have any more data adapters to add to vMX.
Complete the network configuration
You will now see the 3 networks in the networking summary screen – br-ext, br-int and p1p1.
You must enable promiscuous mode in all vSwitches so that packets with any MAC addresses can reach the vMX. e.g. for OSPF to work properly.
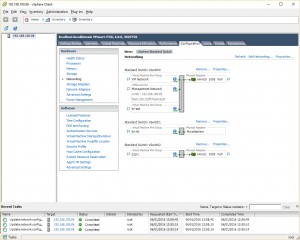
For each vSwitch, click properties, then select vSwitch and click edit. Select security and change promiscuous mode to accept.
Set Up the vMX Virtual Machines
Just like vMX on KVM, there are two VMs that must be created – the virtual control plane (VCP) running the Junos OS, and the virtual forwarding plane (VFP) running an x86 visualised release of Trio running on Wind River Linux.
The process for creating both of the virtual machines is very similar. It’s a simple case of following the VMware wizard and choosing the correct settings for the VM.
VCP
This process below outlines the steps required to create the VCP virtual machine.
- Within the VMware client, select the ESXi host, right click, new virtual machine
- Select to create a custom virtual machine, and press next
- Give the machines a suitable name, e.g. vcp-vmx1
- Select the datastore where you would like to store the VM and press next
- Set the virtual machine version to 8
- For the guest OS type, choose Other, Other (64-bit)
- Select one virtual socket, and 1 cpu core per socket, to assign a total of 1 CPU core to the VCP
- Provision 2GB of memory
- In the network setup, select 2 network adapters.
Asign br-ext as the 1st adapter and br-int as the 2nd adapter.
Set both to be e1000. - Select LSI Logic Parallel as the SCSI controller
- When prompted to select the disk type, choose use an existing virtual disk, and then on the next screen browse to the correct datastore and select the jinstall64-vmx-15.1F4.15-domestic.vmdk image that you uploaded earlier
- At the advanced options page, simply click next
- Select to edit the virtual machine settings before completion and click continue
- Now you need to add two more hard drives – click Add, and then Hard Disk, this time selecting vmxhdd.vmdk as the second drive
- Repeat the add Hard Disk process again this time adding the metadata_usb.vmdk image as the third drive.
NOTE: this 3rd hard drive is important – if you don’t configure it then the first time VCP boots, VCP will setup as an “olive” not vMX!
You can now boot the VCP!
If the boot process appears to wait at “Loading /boot/loader” do not worry, on the VMware release you don’t see the full Junos OS boot process on the console.
VFP
This process below outlines the steps required to create the VFP virtual machine.
- Within the VMware client, select the ESXi hosts, right click, new virtual machine
- Select custom and press next
- Give the machines a suitable name, e.g. vfp-vmx1
- Select the datastore where you would like to store the VM and press next
- Set the virtual machine version to 8
- For the guest OS, choose Other, Other (64-bit)
- When prompted to select the number of CPUs, for this build the minimum you can choose is three virtual sockets, and 1 cpu core per socket, to give a total of 3 CPU cores assigned to the VCP
- Provision 8GB of memory
- In the network setup, select at least 3 network adapters, assigning br-ext as the 1st adapter and br-int as the 2nd adapter. Set them both to be e1000 adapters. The data adapters can now be selected, set them to vmxnet3 or e1000 depending on your preference. For better performance, I’d suggest you use vmxnet3 because this is a paravirtualization adapter.
NOTE: if you wish to use SR-IOV – at the time of writing SR-IOV is not officially supported on VMware, only on KVM. - Select LSI Logic Parallel as the SCSI controller
- When prompted to select the disk to use, choose use an existing virtual disk, and then on the next screen browse to the datastore and select the vFPC-20151203.vmdk image that you uploaded earlier (bear in mind the image naming has changed from vPFE* to vFPC* in this latest release of vMX)
NOTE: on my build the Juniper supplied image needed to be converted to thick provisioned using vmkfstools, otherwise the VM refused to boot (I was getting a VMware error related to free space even though the drives were not full). You may not have to do this! Thanks to @tomverhaeg for working through this strange issue with me! - At the advanced options page, simply click next
- At Ready to Complete, you can click finish and boot the VFP!
NOTE: VMware virtual console for the VFP does not show anything beyond “Please Wait: Booting” – if you wish to login to the VFP you will need to configure serial console. The process for setting up serial console is described here.
Verification
At this point if both machines have powered on successfully you should have a running vMX.
Now login to the VCP and run the Junos command “show chassis fpc”. After a few moments you should see the FPC as online and ge-* interfaces will appear.
Have fun!
For more information, please refer to the Juniper documentation on the VMware release of vMX.
